AWS - Implementing a Phishing Assessment Infrastructure
Introduction
Email-based attacks remain one of the most prevalent threat vectors in cybersecurity. Understanding the mechanics of phishing campaigns is crucial for security professionals to implement effective defenses. This guide demonstrates the setup of a controlled phishing assessment environment using AWS services and GoPhish, enabling security teams to conduct authorized testing and awareness training.
Prerequisites
Required Tools
- GoPhish - Open-source phishing framework
- AWS Account with access to:
- EC2
- Simple Email Service (SES)
- Route 53
Documentation
Infrastructure Setup
EC2 Configuration
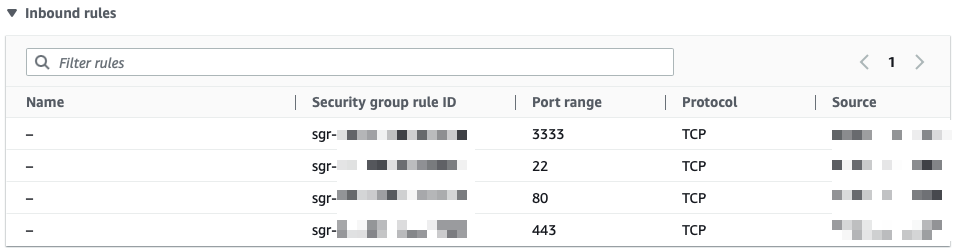
Configure the Ubuntu EC2 instance with the following security group rules:
Inbound Rules:
- Management Ports (TCP 22, 3333): Restrict to your IP address
- Web Ports (TCP 80, 443): Allow public access for landing page functionality
DNS Configuration
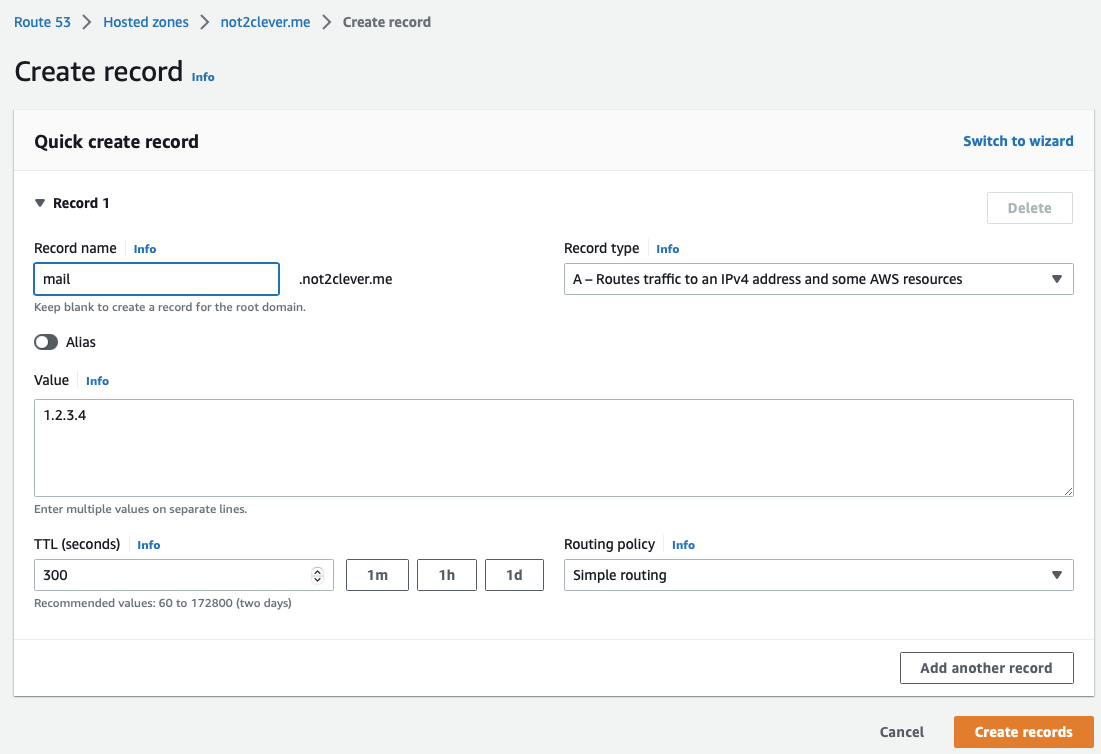
Create a dedicated subdomain in Route 53 to maintain separation from production environments:
- Navigate to Route 53 console
- Create an A record pointing to your EC2 instance
- Verify DNS propagation
GoPhish Installation
Deployment Steps
- Download and extract GoPhish:
wget https://github.com/gophish/gophish/releases/download/v0.12.1/gophish-v0.12.1-linux-64bit.zip
unzip gophish-v0.12.1-linux-64bit.zip
chmod +x gophish
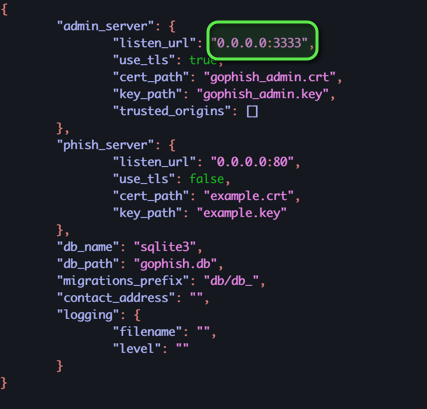
- Modify the configuration for external access:
- Edit
config.json - Change admin interface binding from
127.0.0.1:3333to0.0.0.0:3333
- Edit
- Launch the application:
sudo ./gophish
Initial credentials will be displayed in the console output:

Administrative Interface
Access the admin interface at https://<your-ip>:3333:
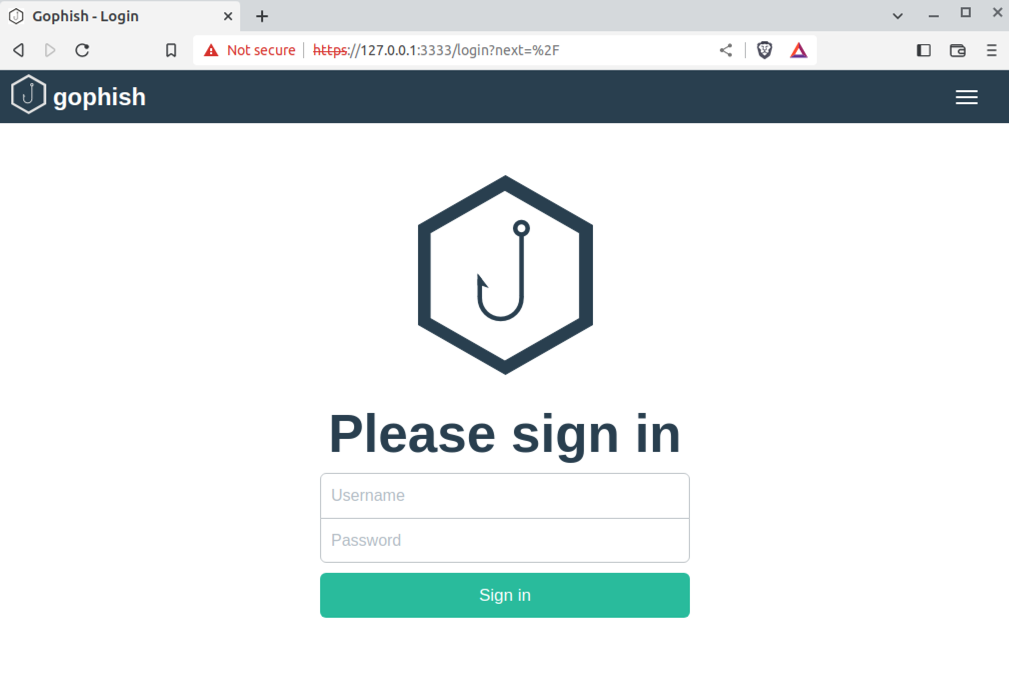
After initial login, you’ll be prompted to change the default password. Upon completion, you’ll access the main dashboard:

Note: For production environments, implement proper SSL certification. This setup demonstrates basic functionality only.
AWS SES Configuration
Email Identity Verification
- Create an SES identity for your sending domain/email
- Verify ownership through the confirmation email
- Note that initial accounts are placed in the SES sandbox environment

SMTP Credentials
- Generate SMTP credentials in the SES console
- Securely store the credentials (they are only displayed once)
- Note sandbox limitations:
- 200 emails per 24-hour period
- Rate limiting applies

GoPhish Campaign Configuration
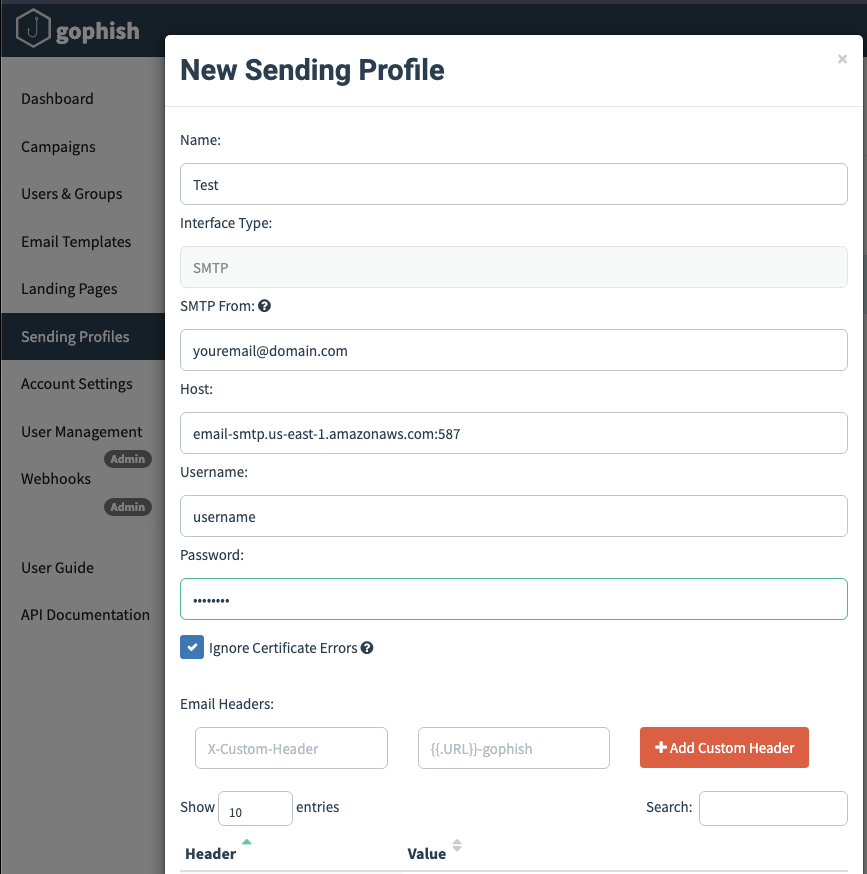
Sending Profile Setup
Configure the sending profile with your SES SMTP credentials:
Security Considerations
For production deployments, consider implementing:
- SSL/TLS certificates for all endpoints
- Domain authentication (DKIM/SPF records)
- IP reputation monitoring
- Strict access controls
- Campaign tracking and logging
Conclusion
This infrastructure provides a foundation for conducting authorized phishing assessments and security awareness training. While this setup demonstrates basic functionality, production environments should implement additional security measures and follow organizational security policies.
The combination of AWS services and GoPhish enables security teams to:
- Evaluate email security controls
- Conduct targeted awareness training
- Test incident response procedures
- Gather metrics on security awareness
Future enhancements could include:
- Domain reputation management
- Advanced email authentication
- Custom landing page development
- Integration with security awareness platforms
Note: Ensure all phishing assessments are conducted with proper authorization and in compliance with applicable regulations and policies.