AWS Infrastructure for Command and Control Operations
Overview
This technical guide demonstrates the deployment of a Command and Control (C2) infrastructure using AWS services. The walkthrough covers EC2 instance configuration, DNS management with Route 53, and security considerations for red team operations.
Infrastructure Setup
EC2 Instance Configuration
-
Instance Specifications:
- Free tier eligible Ubuntu instance
- 1 GB RAM
- 1 vCPU
- 20 GB storage
-
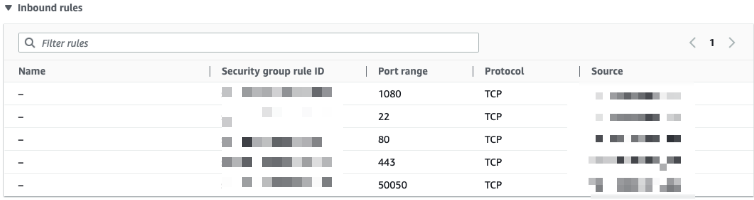
Security Group Configuration:
- Restricted access to authorized IP
- Minimal port exposure
- Principle of least privilege
Initial Access Verification
Test SSH connectivity using key-based authentication:
ssh -i ubuntu_cs.pem ubuntu@ec2-1-2-3-4.compute-1.amazonaws.com
C2 Framework Deployment
Transfer required files to EC2 instance:
scp -i ubuntu_cs.pem -r cobaltstrike ubuntu@ec2-1-2-3-4.compute-1.amazonaws.com:/home/ubuntu/cobalt
Command and Control Setup
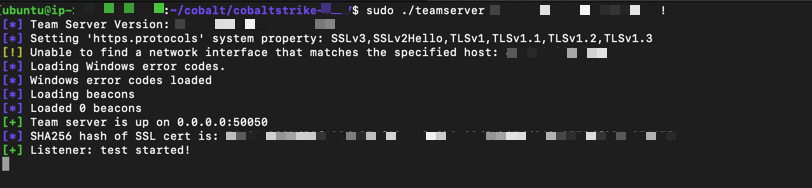
Team Server Configuration
Initialize team server with required parameters:
sudo ./teamserver <TEAM_SERVER_IP> <AUTHENTICATION_PASSWORD>
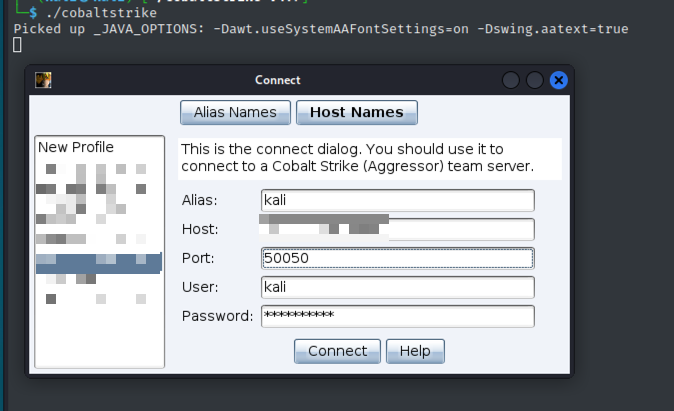
Client Configuration
- Launch C2 client on operator system:
./cobaltstrike
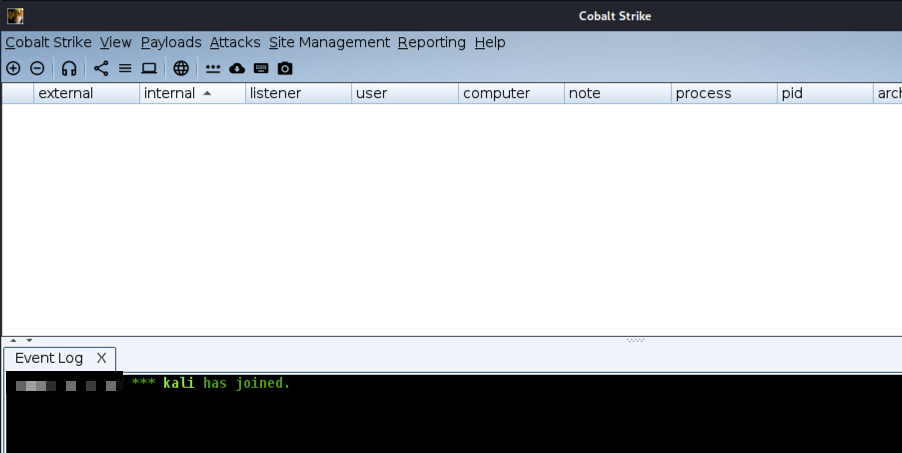
- Operator Interface:
DNS Infrastructure
Route 53 Configuration
Implementing DNS redirection for C2 traffic obfuscation:
-
Access Route 53 Hosted Zone:
-
Record Creation Process:
-
Subdomain Configuration:
DNS Implementation
- Configured subdomain:
c2traffic.not2clever.me - Purpose: Abstract direct IP addressing
- Benefit: Enhanced operational flexibility
Security Considerations
Current Implementation
- Direct DNS resolution
- Limited network restrictions
- Basic authentication mechanisms
Future Enhancements
-
CloudFront Integration
- IP address obfuscation
- Traffic distribution
- Enhanced operational security
-
Additional Security Layers
- SSL/TLS implementation
- Traffic categorization
- Domain rotation
Future Infrastructure Expansion
Planned Implementations
-
Social Engineering Infrastructure
- GoPhish deployment
- Campaign management
- Engagement tracking
-
Infrastructure Hardening
- Network segmentation
- Access control refinement
- Monitoring implementation